How To Use PLR Products To Grow Your Blog
September 10, 2022
How To Use Images in Blog Posts
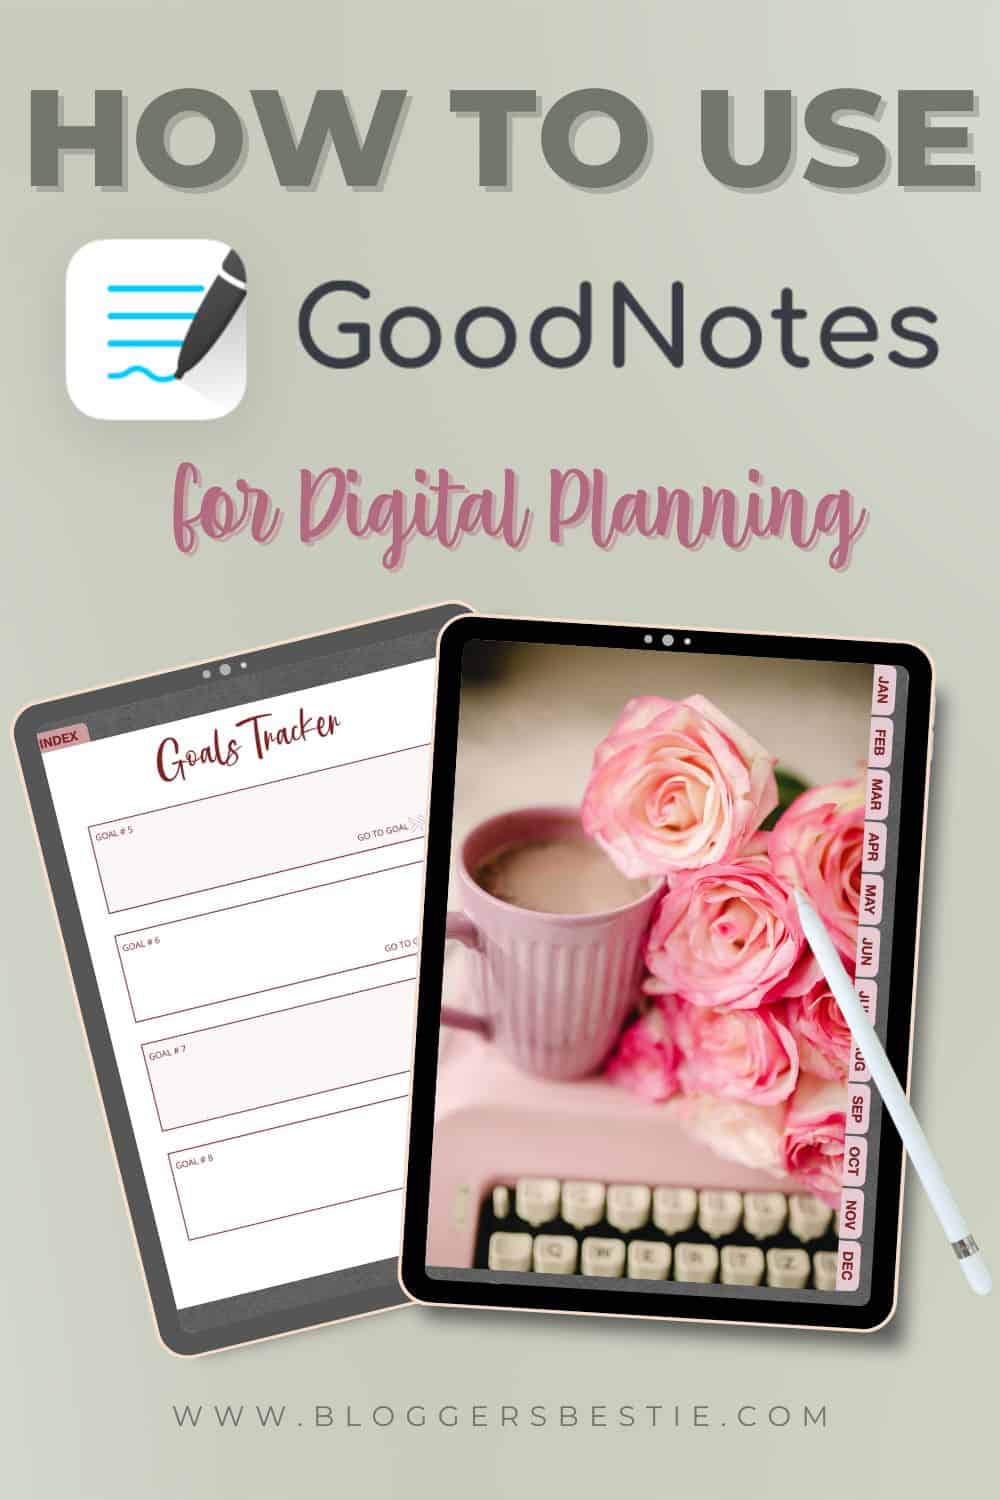
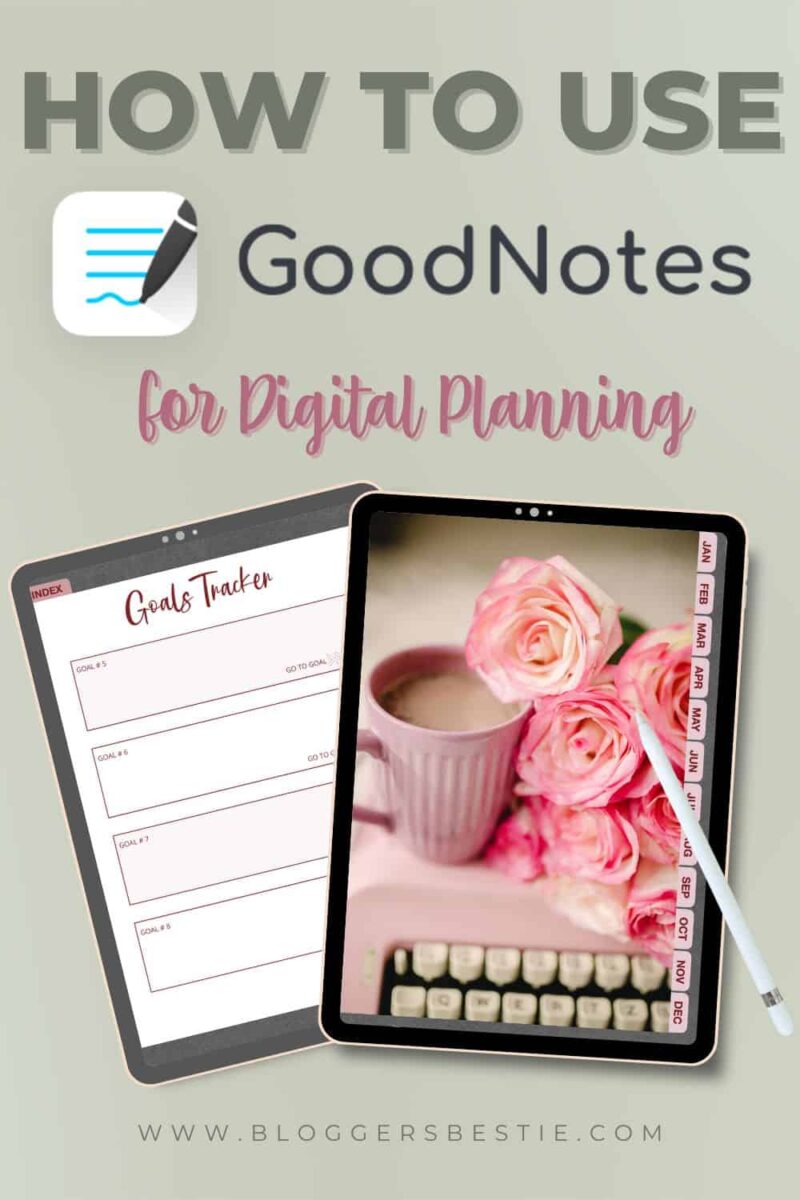
November 15, 2022Learn how to use GoodNotes for Digital Planning on your iPad. GoodNotes is a practical way to keep your schedule, notes, and to-do lists at your fingertips. Here is a tutorial on how to use GoodNotes for all of your digital planning needs.
What is GoodNotes?
GoodNotes 5 is a dynamic pdf annotation app for iOS that takes digital note-taking and digital planning to the next level. GoodNotes is best used on an iPad along with an Apple Pencil but will also sync with your iPhone or Mac devices. GoodNotes is a powerful tool for keeping all of your notes and documents right at your fingertips.
GoodNotes lets you take handwritten notes and turn them into digital notes to help you study, keep track of tasks, organize your time, and more.
Getting started with GoodNotes
To get started with the GoodNotes App, download the app from the app store onto your iPad. Once you create your account, you are ready to go. GoodNotes allows for three free notebooks or you can upgrade to unlimited with a one-time purchase of $8.99.
How to Start a New Notebook
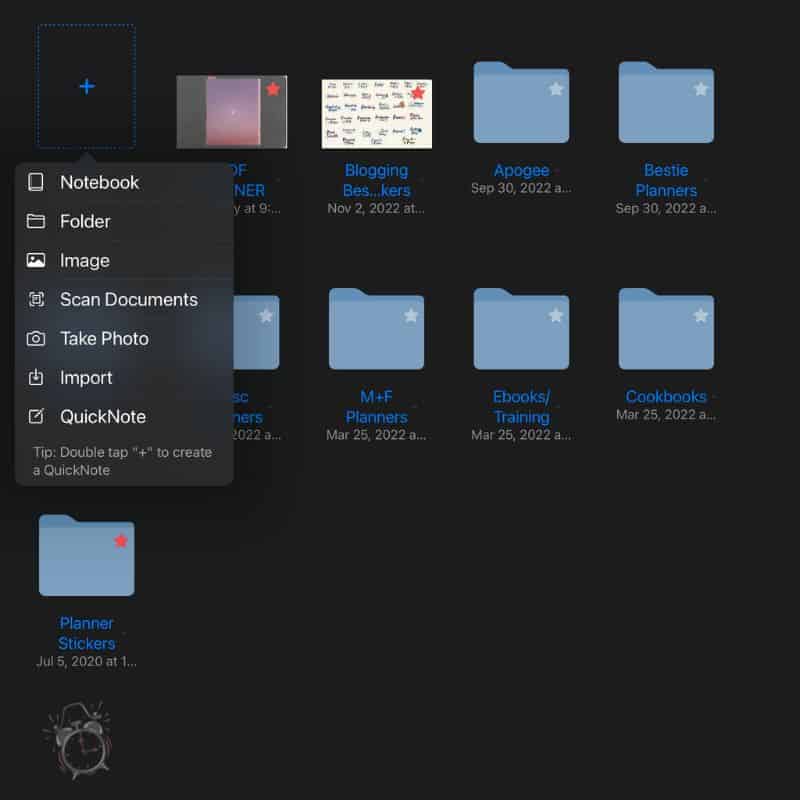
To start a new digital notebook in GoodNotes, launch the app and tap on the square with the plus sign in the top left corner of the documents area.
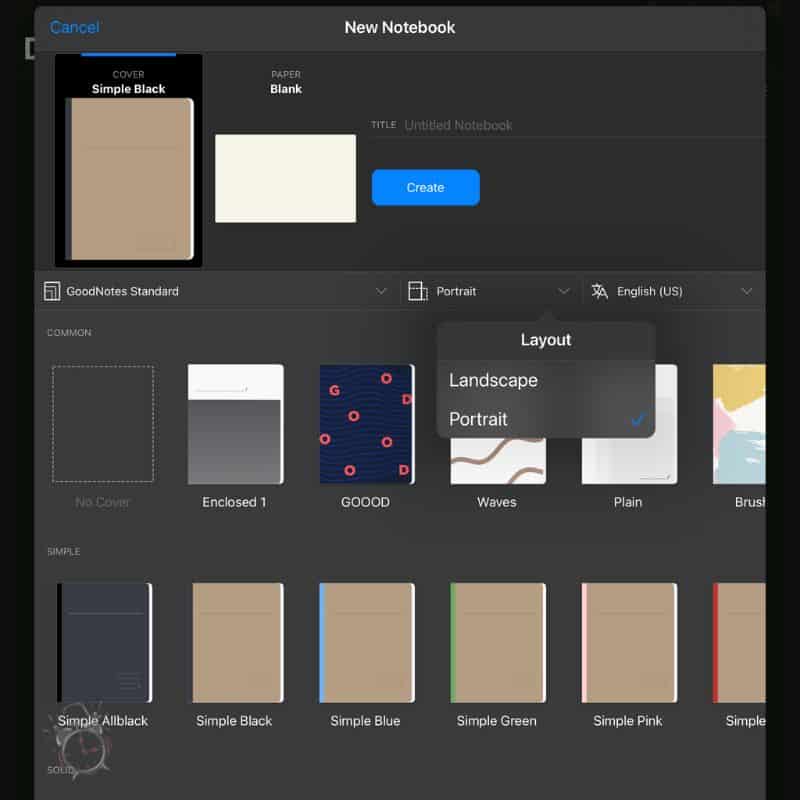
A menu will open that allows you to “design” your notebook. You can choose landscape or portrait mode, choose the cover, and even choose the type of digital “paper” you want inside. Then, name your Notebook and it is ready to use!
How to Import a Document into GoodNotes
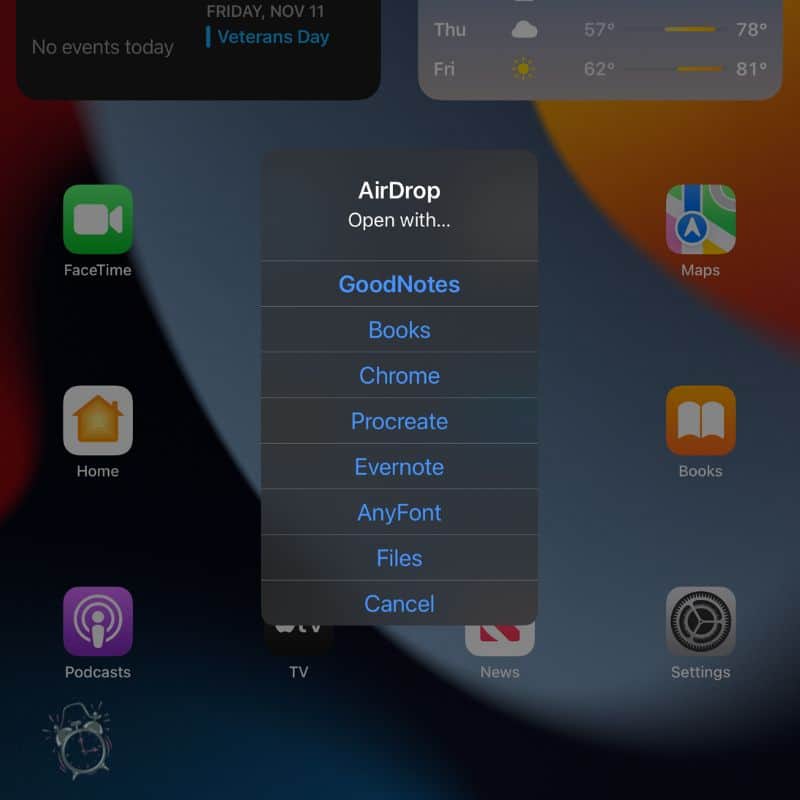
To import a document into GoodNotes you can either download the file to your device and open it or AirDrop the document from your other Mac Products. A popup will appear that gives you the option to Open With GoodNotes.
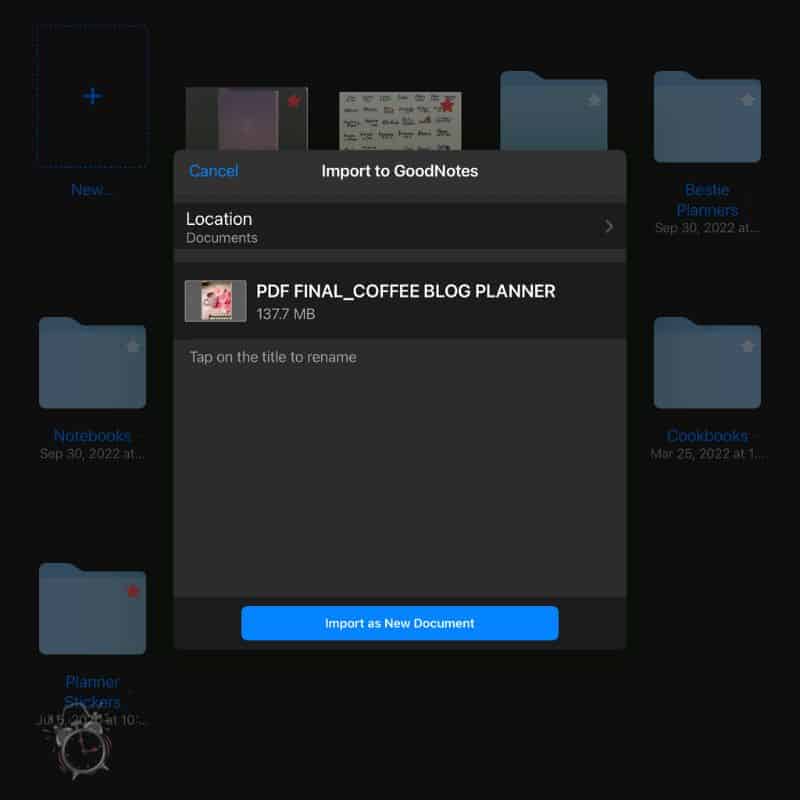
The second screen will ask if you want to add the document to an existing document or – like in the case of importing a new planner – you will “Create New Document.” This will place the file into GoodNotes as its own stand-alone document.
Using GoodNotes Tools
GoodNotes comes with a plethora of tools built right into the app – but there is a bit of a learning curve to understand how each one works. Like anything else, once you understand the functionality of each one, your experience will be a breeze.
First, it is important to understand there are two main “modes” in GoodNotes – editing and navigation.
Navigation mode is what allows you to use your finger, Apple Pencil, or stylus to tap on tabs, pages, and even outbound links within the GoodNotes documents. Editing allows for writing, highlighting, adding shapes and stickers, and more.
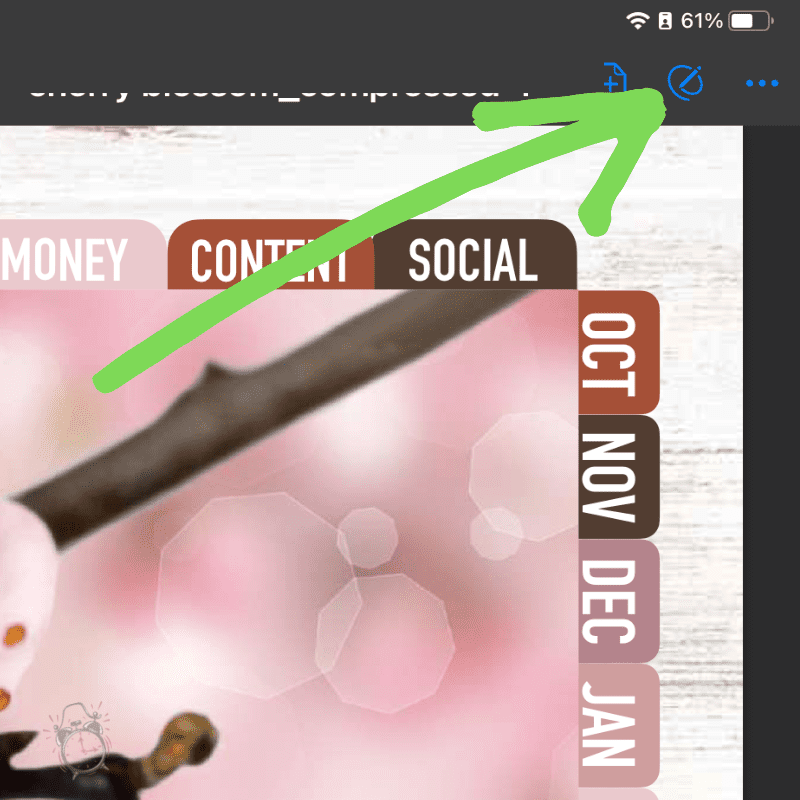
To toggle between editing mode and navigation mode, tap on the pencil icon in the upper right corner. If you are tapping on things and the app is not navigating – chances are that you are in edit mode.
Using the Pen Tool in GoodNotes
Probably the most used tool will be the Pen Tool which has several different functions and options. First, make sure that you are in editing mode, and tap on the little pen icon in the toolbar. If you hold down the pen the options will appear.
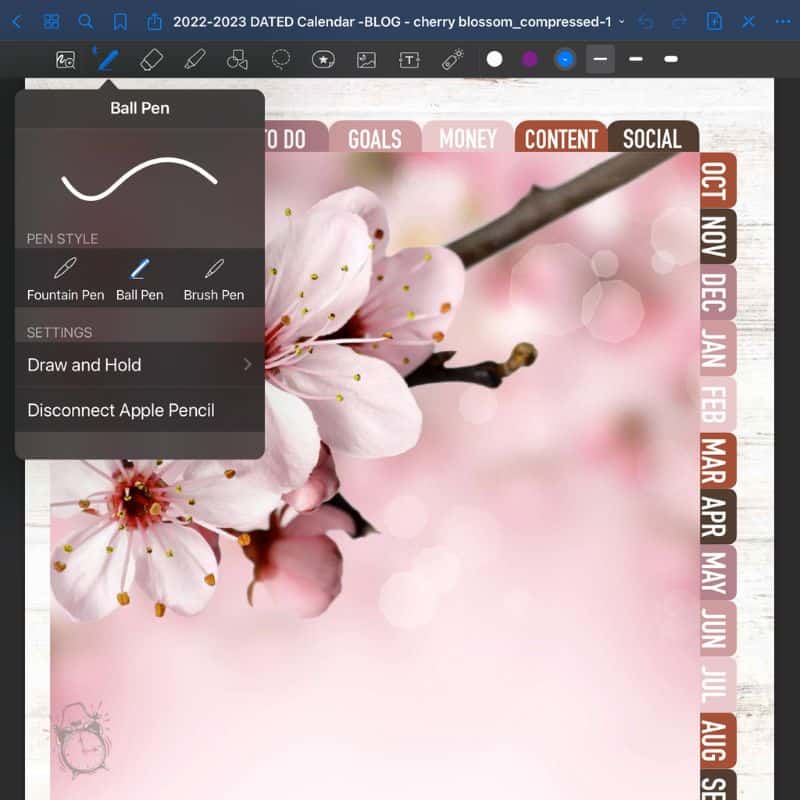
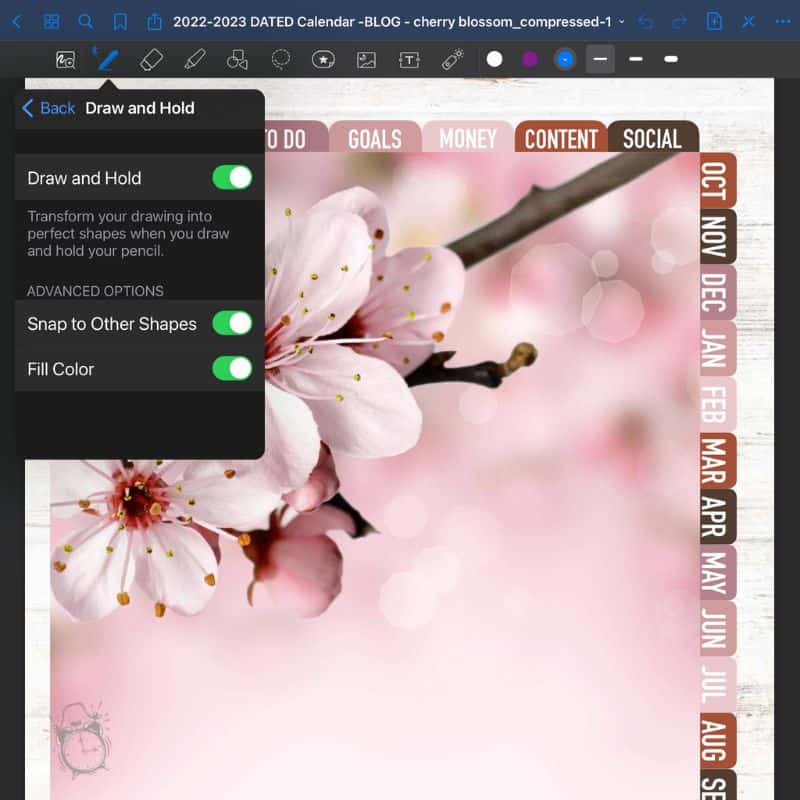
You can choose a fountain pen, ball pen, or brush pen style as well as activate the “draw and hold” function. The “draw and hold” function turns your drawings into a perfectly straight line and/or shape by holding the stylus down.
Erasing, Highlighting, and Shapes
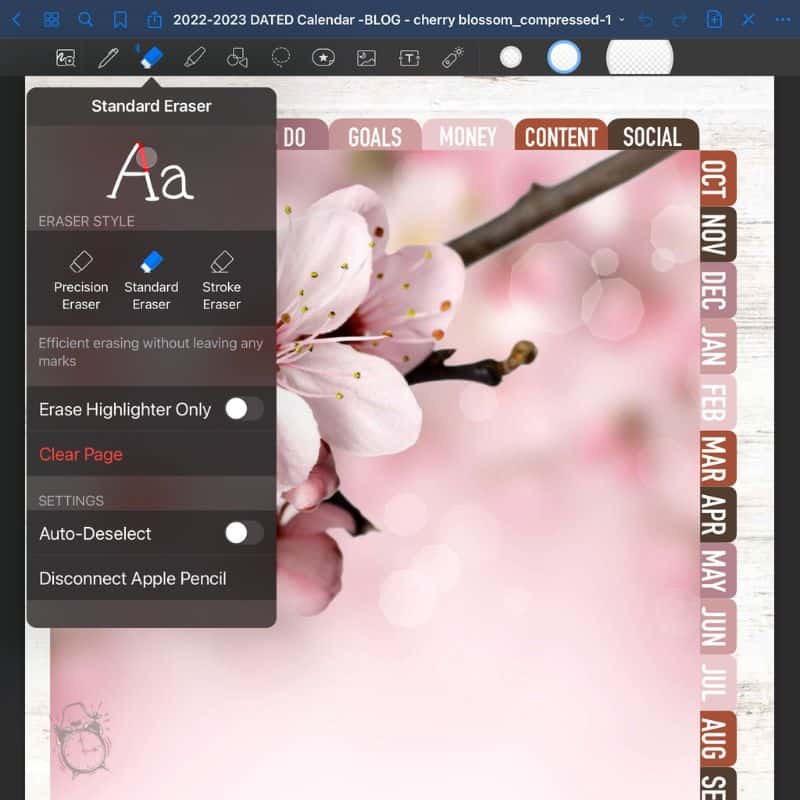
The next three icons in the toolbar include the erase tool, highlighter tool, and shape elements tool. While these are basic tools that are pretty self-explanatory, they do have a few options that are good to know in case you need them.
The Eraser Tool will let you erase different elements from the page individually, or erase the entire section. You can also clear the entire page with one tap by hitting “clear page.”
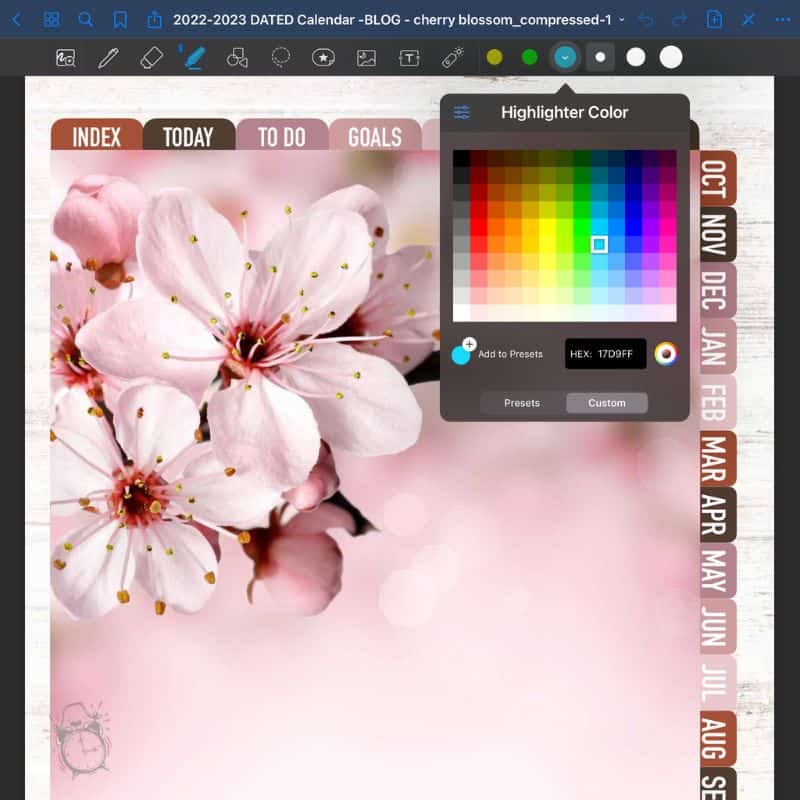
The Highlighter Tool will let you choose any color for a transparent hue. Even choosing dark colors, any text color on the page will show through – just as if it was a highlighter on paper.
The Shape Tool lets you quickly add shapes to your documents and even has a setting that lets you choose the color fill. For instance for a perfect circle, choose the Shapes Tool, draw a circle and hold.
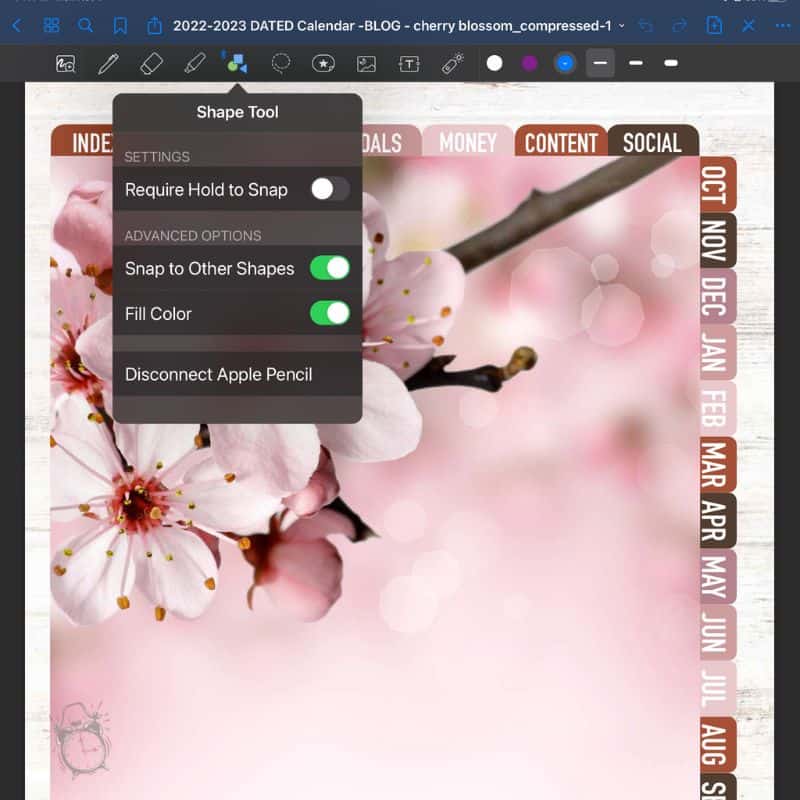
The drawing will immediately “snap” to a perfect circle with the outline and fill in the color you chose. To erase the outside line, hit the “undo” icon one time in the upper right-hand corner.
How To Use The Lasso Tool in Goodnotes
The Lasso Tool is one of my favorite things about GoodNotes because it allows you to “lasso” just about anything and drag it around your GoodNotes documents. You can even drag things between documents using the side-by-side view.
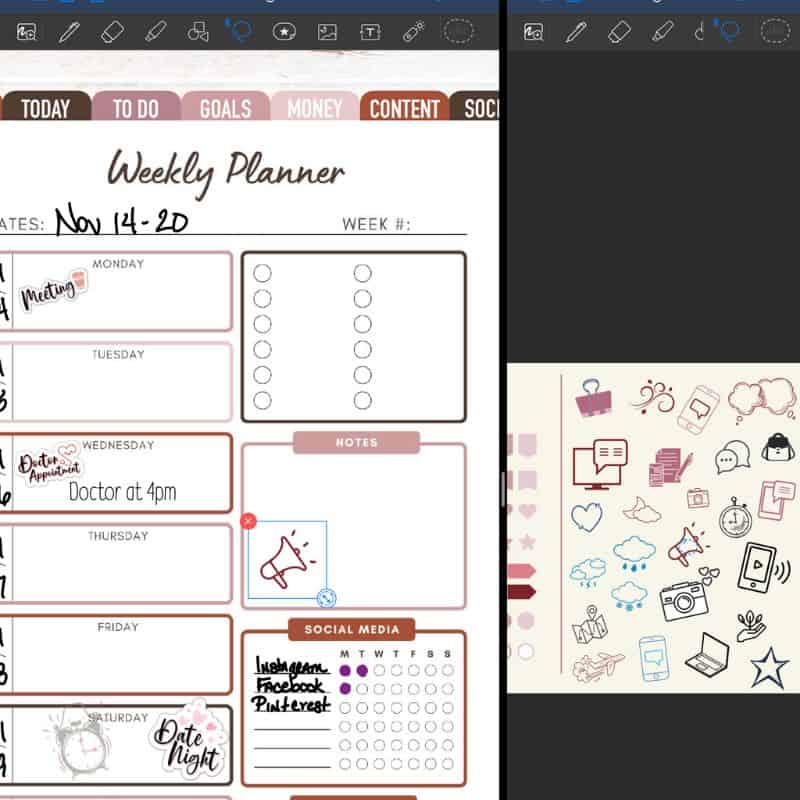
In this photo, I have my BloggersBestie PLR Planner open beside my BloggesBestie Free Digital Stickers. Using the Lasso Tool, I “grabbed” the megaphone from the sticker book and with my Apple Pencil did a long hold and drag it into the planner in the other window. From there you can edit the sticker to whatever size you want. Tap one more time to “drop” the sticker.
How To Add Images or Digital Stickers
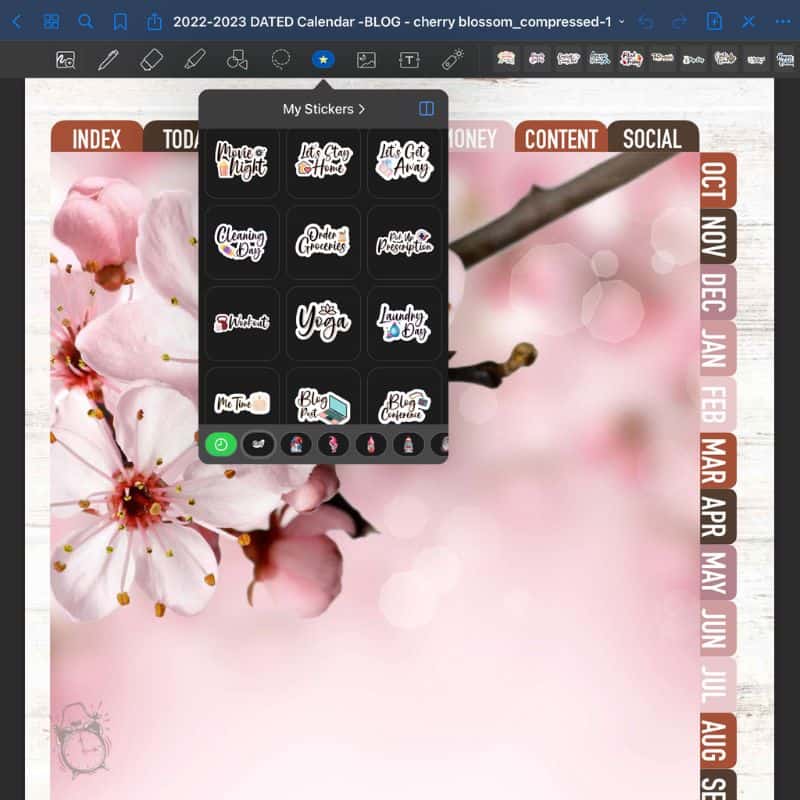
The next two icons in the toolbar allow you to insert digital stickers and images directly from the app. GoodNotes comes with some digital stickers already included – like little sticky notes, tabs, and other fun little icons.
You can also create your own sticker collections by scrolling all the way to the right and hitting the plus symbol. You can then name your collection and import images from your Camera Roll.
When you hit the image icon once, your camera roll images appear to the right of the toolbar. Tapping twice will open up a window that allows you to search your photos, albums, and even iCloud.
With iOS16 you can open a second window with your camera roll and do a long hold on the subject of a photo. iOS16 will “grab” the subject and allow you to drag it into the GoodNotes app with a transparent background. This is great for planning and note-taking as well as Digital Scrapbooking.
How to type into GoodNotes – Scribble
If you would rather use typed text in GoodNotes, you can turn on “Scribble” in your Apple Pencil settings and then insert a text box into GoodNotes and start writing. The words that you write will automatically convert into text inside the GoodNotes app.
You can also insert the Text Tool and tap on the keyboard icon that appears at the bottom of your iPad screen.
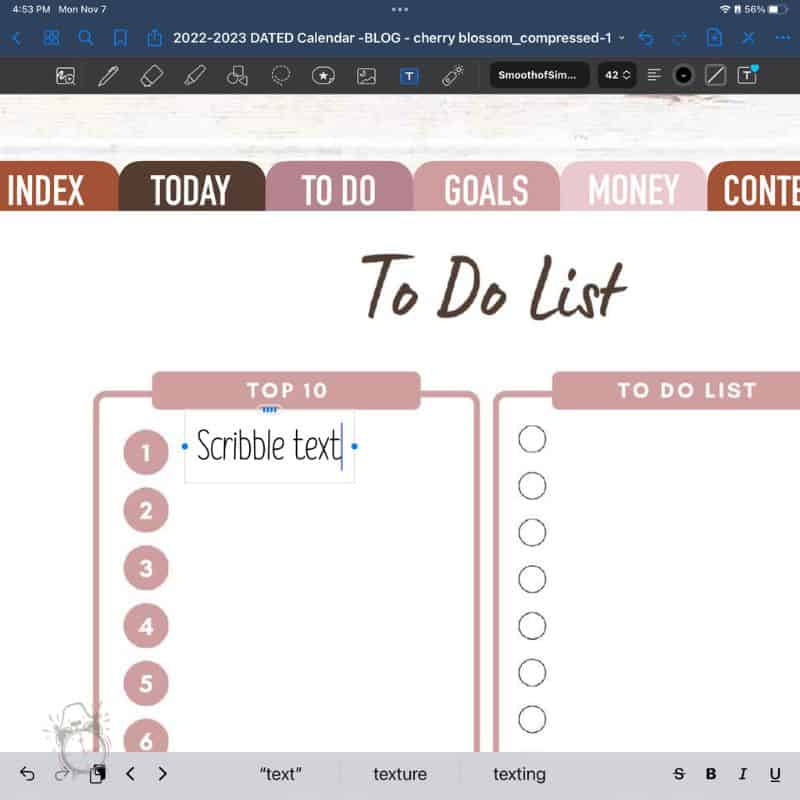
You can set the font, size, and color and then tap the text icon with the little heart to save the settings for future use of the text tool.
How to Add Pages in GoodNotes
You can easily add pages in GoodNotes with just a few taps. From any document, tap the add a page icon in the top right-hand corner.
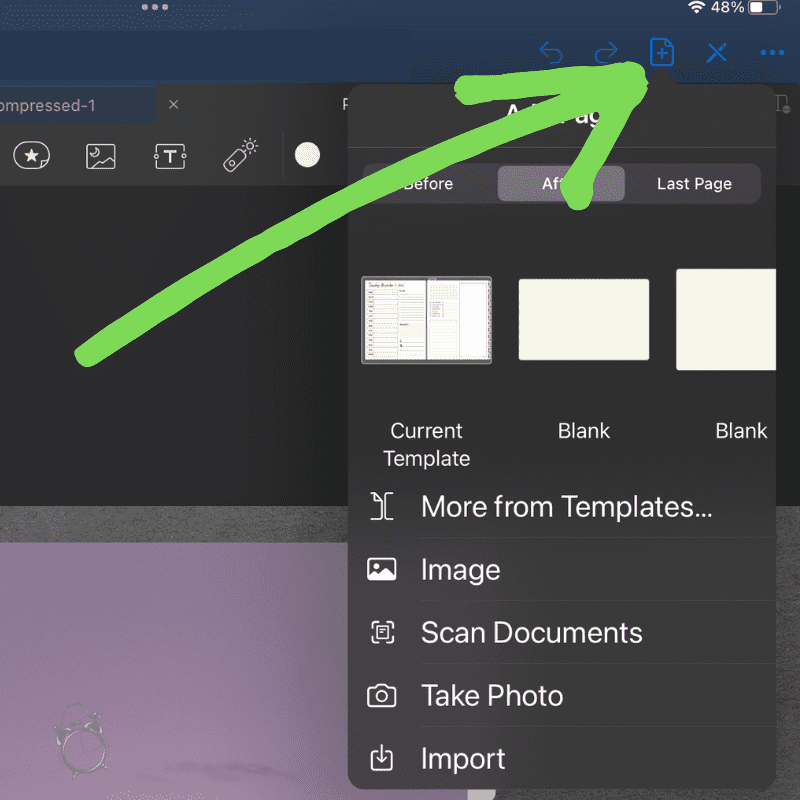
A pop-up menu will appear that lets you choose if you want to insert a duplicate of the current page or a selection of blank pages. You can also choose to insert an image, scan a document using the iPad camera, take a photo, or import a file.
Make sure to also pay attention to where you are inserting the page – before the current page, after the current page, or as the last page of the document.
How to Rearrange Pages in GoodNotes
Another great feature of GoodNotes is the ability to rearrange pages in your document without messing up and of the internal links* From any document, tap on the four squares in the top left-hand corner of the screen.
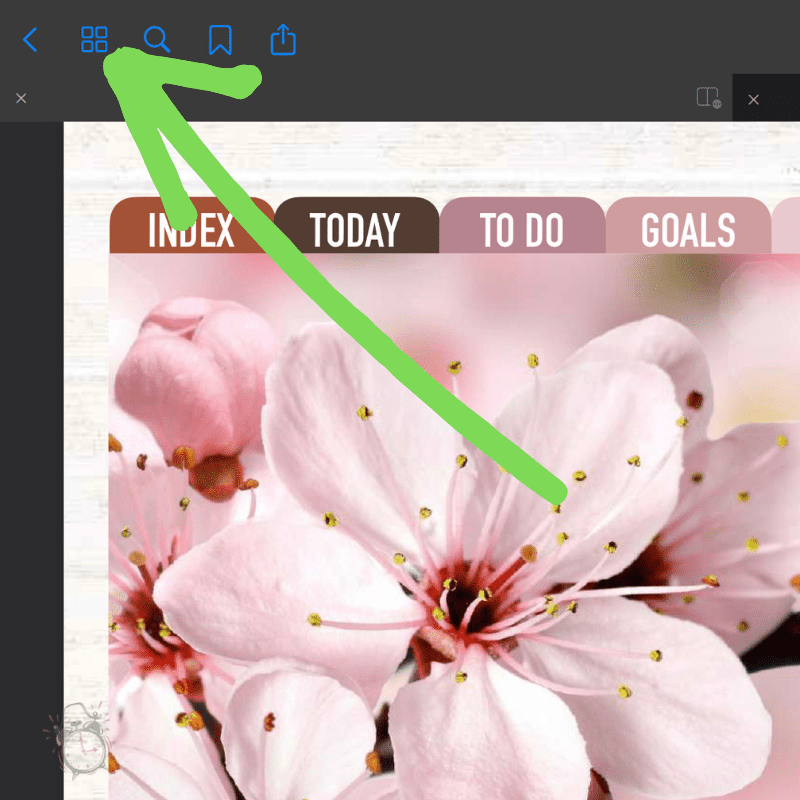
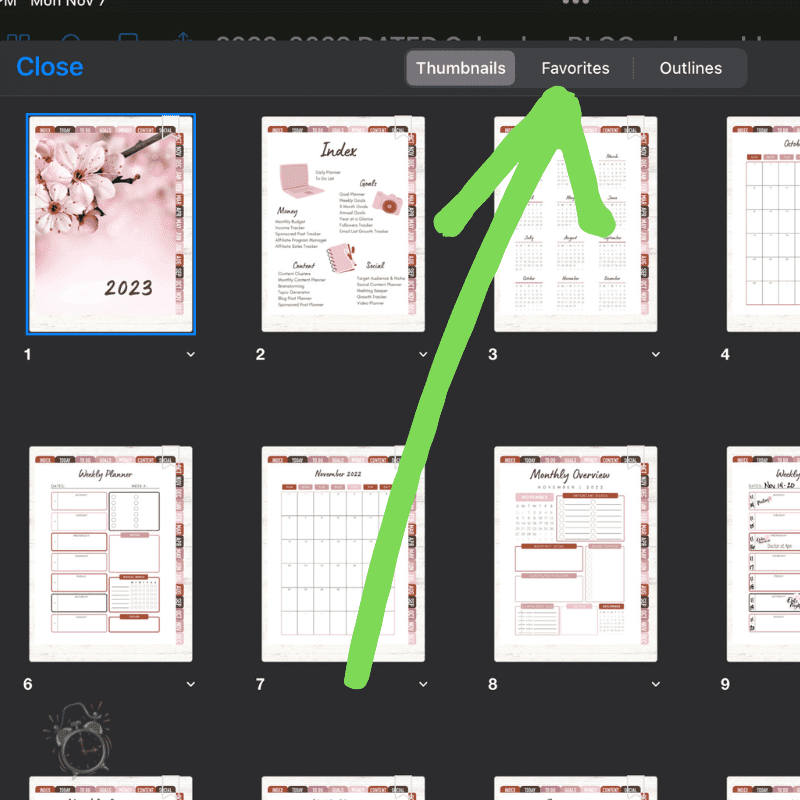
This will open a screen with all of the pages’ thumbnail views. To rearrange simply tap and hold the page that you want to move, and drag it to the location where you want it to be.
*Do not delete pages with internal links such as Index Pages or Jump Pages. Adding and rearranging should be fine – just do not delete!
How To View Favorite Pages
Since GoodNotes is designed to keep ALL of your notes in one place, they did make it easy for you to find the most important pages.
When you are on a page that you want to easily return to, hit the little bookmark icon on the top left corner. It will turn red to notify you that it has been favorited.
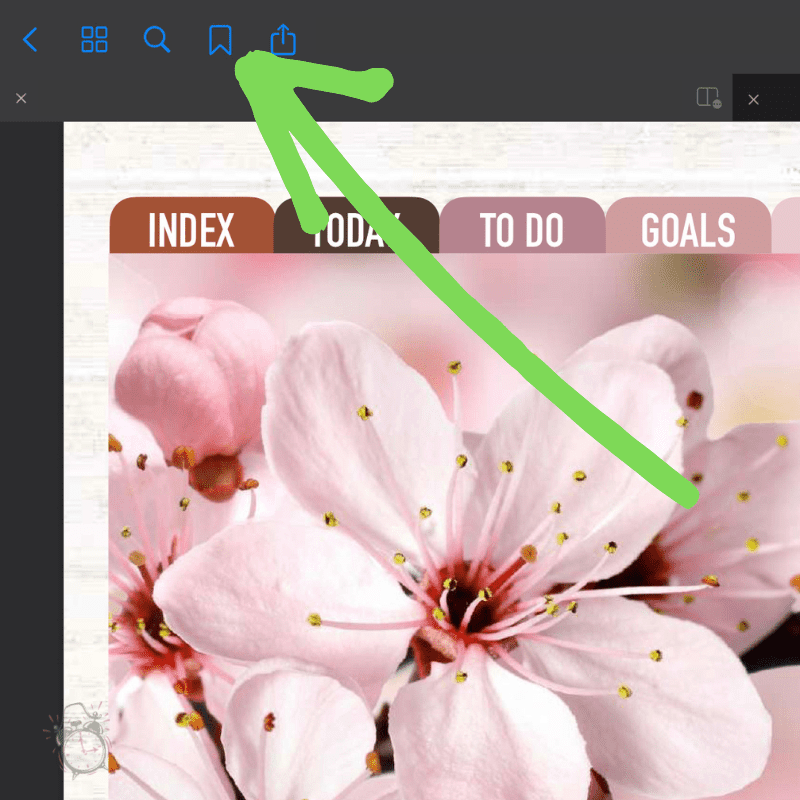
Then, from the Thumbnails Screen tap on “Favorites” to see all of the pages within that document that you have bookmarked.
Digital Planning with GoodNotes
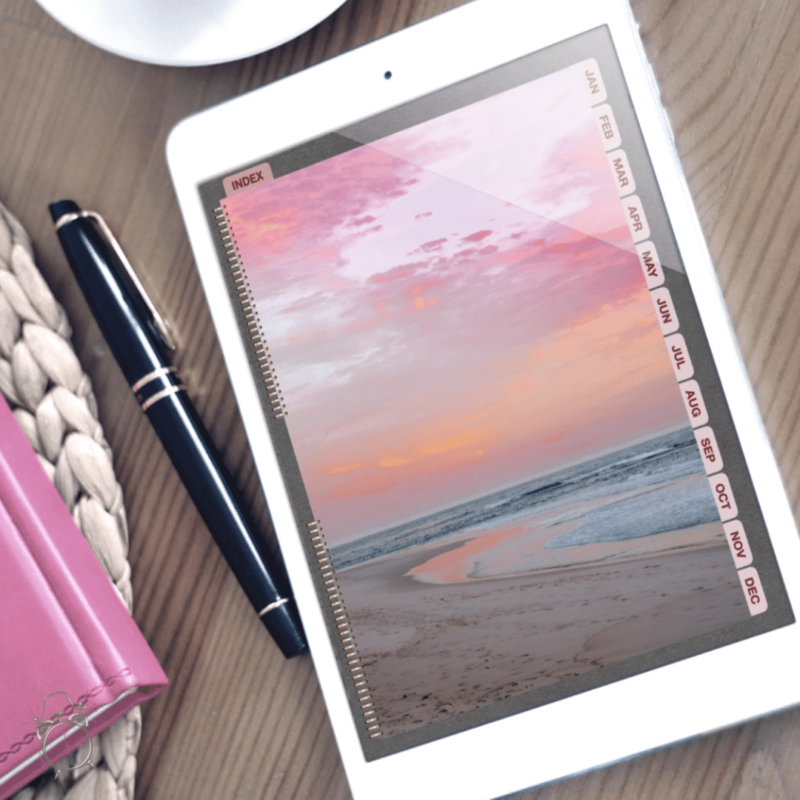
While GoodNotes can be used for note-taking, the real power comes in using GoodNotes for digital planning. Digital Planning in GoodNotes allows for nearly everything you can do with a paper planner inside of an app that syncs across your devices.
A good digital planner lets you keep everything that you need to organize your life all in one place. The BloggersBestie Digital Blogging Planner, for instance, has over 850 pages to keep everything you need in one place. There is no way a paper planner could match that!
Digital Stickers for GoodNotes
Similar to paper stickers, digital stickers let you decorate and customize your GoodNotes Planner to make it more efficient and aesthetically pleasing for you! Any image can be turned into a digital sticker and placed inside any document.
When you insert a digital sticker into a GoodNotes file, you can easily adjust the size or rotate the sticker however you need to. This is just another huge benefit to digital planning versus paper planning.

Conclusion
The GoodNotes app is hands down the best app for digital planning on an iOS device.
